GitHub
GitHub's Copilot
Acquisition Flow


Overview
My main project as a Product Design Intern for GitHub was to redesign the acquisition flow for GitHub’s AI code completion product, Copilot. Acquisition flow refers to the process in which a user sign up for and purchase a product of service – this case being Copilot.
Our team found that users felt disoriented and uninformed during the flow, lowering conversion and increasing the number of tickets that the support team had to work through. My goal in this exploration was to improve the acquisition flow by orienting the user through clarity and consistency.
Process
What are we trying to do?
Because there was no way to know which step was coming up in the flow, users felt disoriented and uninformed. Furthermore, there was confusion and concern regarding certain steps of the flow, particularly whether or not the user would have an opportunity to assign Copilot seats to members of their organization before being charged. These issues lowered conversion and increased the number of support tickets that the team had to work through.
Keeping these issues in mind, my main goal in improving the acquisition flow was to orient the user through clarity and consistency.
In order to do that, I knew I needed to communicate what steps were in the flow and allow the user them to move through them as they please. I also needed needed to leverage GitHub’s Design System to create an accessible and consistent GitHub interface.
How might we design a clear and accessible acquisition flow that prioritizes user orientation and confidence?
How might we design a clear and accessible acquisition flow that prioritizes user orientation and confidence?
How might we design a clear and accessible acquisition flow that prioritizes user orientation and confidence?

User Flows
The first step in redesigning this experience was deciding on an intuitive flow.
One of the major pain points for users was confusion regarding when they would make a purchase, as they had to confirm payment details before assigning Copilot seats. Ideally, we would simply reorder the steps, but we had to work under the constraint of confirming payment details before assigning seats for processing logistics.
Therefore, I had to design a solution that would communicate to users that they would have a chance to assign seats in a later step and that they would not be charged right after confirming their payment details.

Mockups
After synthesizing research and exploring other acquistion flows both within GitHub and other products, I decided that a progress bar would be the most effective way to orient this user. Furthermore, I needed to add navigational elements on each page. This would clearly communicate to the user which step is to follow, as well as allow them to move back and forth between steps.
Once I decided to move forward with the progress bar and navigational elements solution, I explored various layouts.
Low-Fidelity Mocks

Mid-Fidelity Mocks
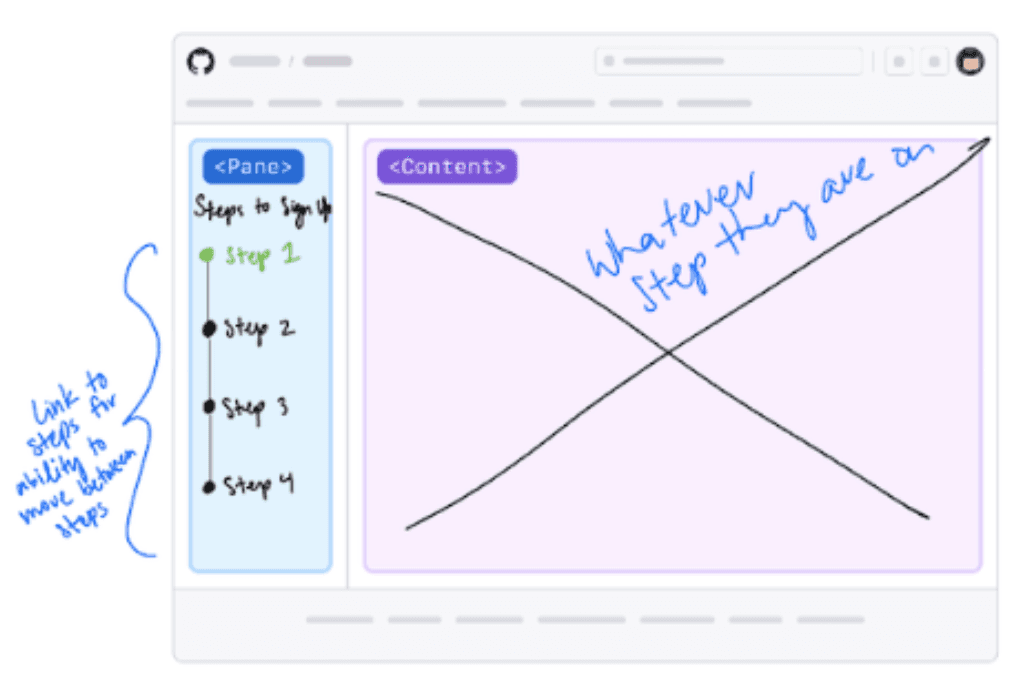
To stay consistent with other GitHub interfaces, I chose to have a vertical progress bar on the left-hand side of the screen.
To stay consistent with other GitHub interfaces, I chose to have a vertical progress bar on the left-hand side of the screen.

High-Fidelity Mocks – Progress Bar
Using Github’s Design System, I explored various progress bar iterations. This was one of the most crucial parts of this process, as it was directly addressing the orientation needs of the users.
I decided to go with a design similar to Iteration 3, as it gave the possibility for communicating to the user which steps they have completed successfully.
Using GitHub’s Design System, I explored various progress bar iterations. This was one of the most crucial parts of this process, as it was directly addressing the orientation needs of the users.
I decided to go with a design similar to Iteration 3, as it gave the possibility for communicating to the user which steps they have completed successfully.

Result
Step 1: Organization Selection
Scalable organization selection – if they have more orgs, scrolling can be added or even pagination in extreme cases. To select an org, we rely on a radio button to communicate that they can only select one organization to purchase Copilot for in this flow.
Scalable organization selection – if they have more orgs, scrolling can be added or even pagination in extreme cases. To select an org, we rely on a radio button to communicate that they can only select one organization to purchase Copilot for in this flow.
Scalable organization selection – if they have more orgs, scrolling can be added or even pagination in extreme cases. To select an org, we rely on a radio button to communicate that they can only select one organization to purchase Copilot for in this flow.
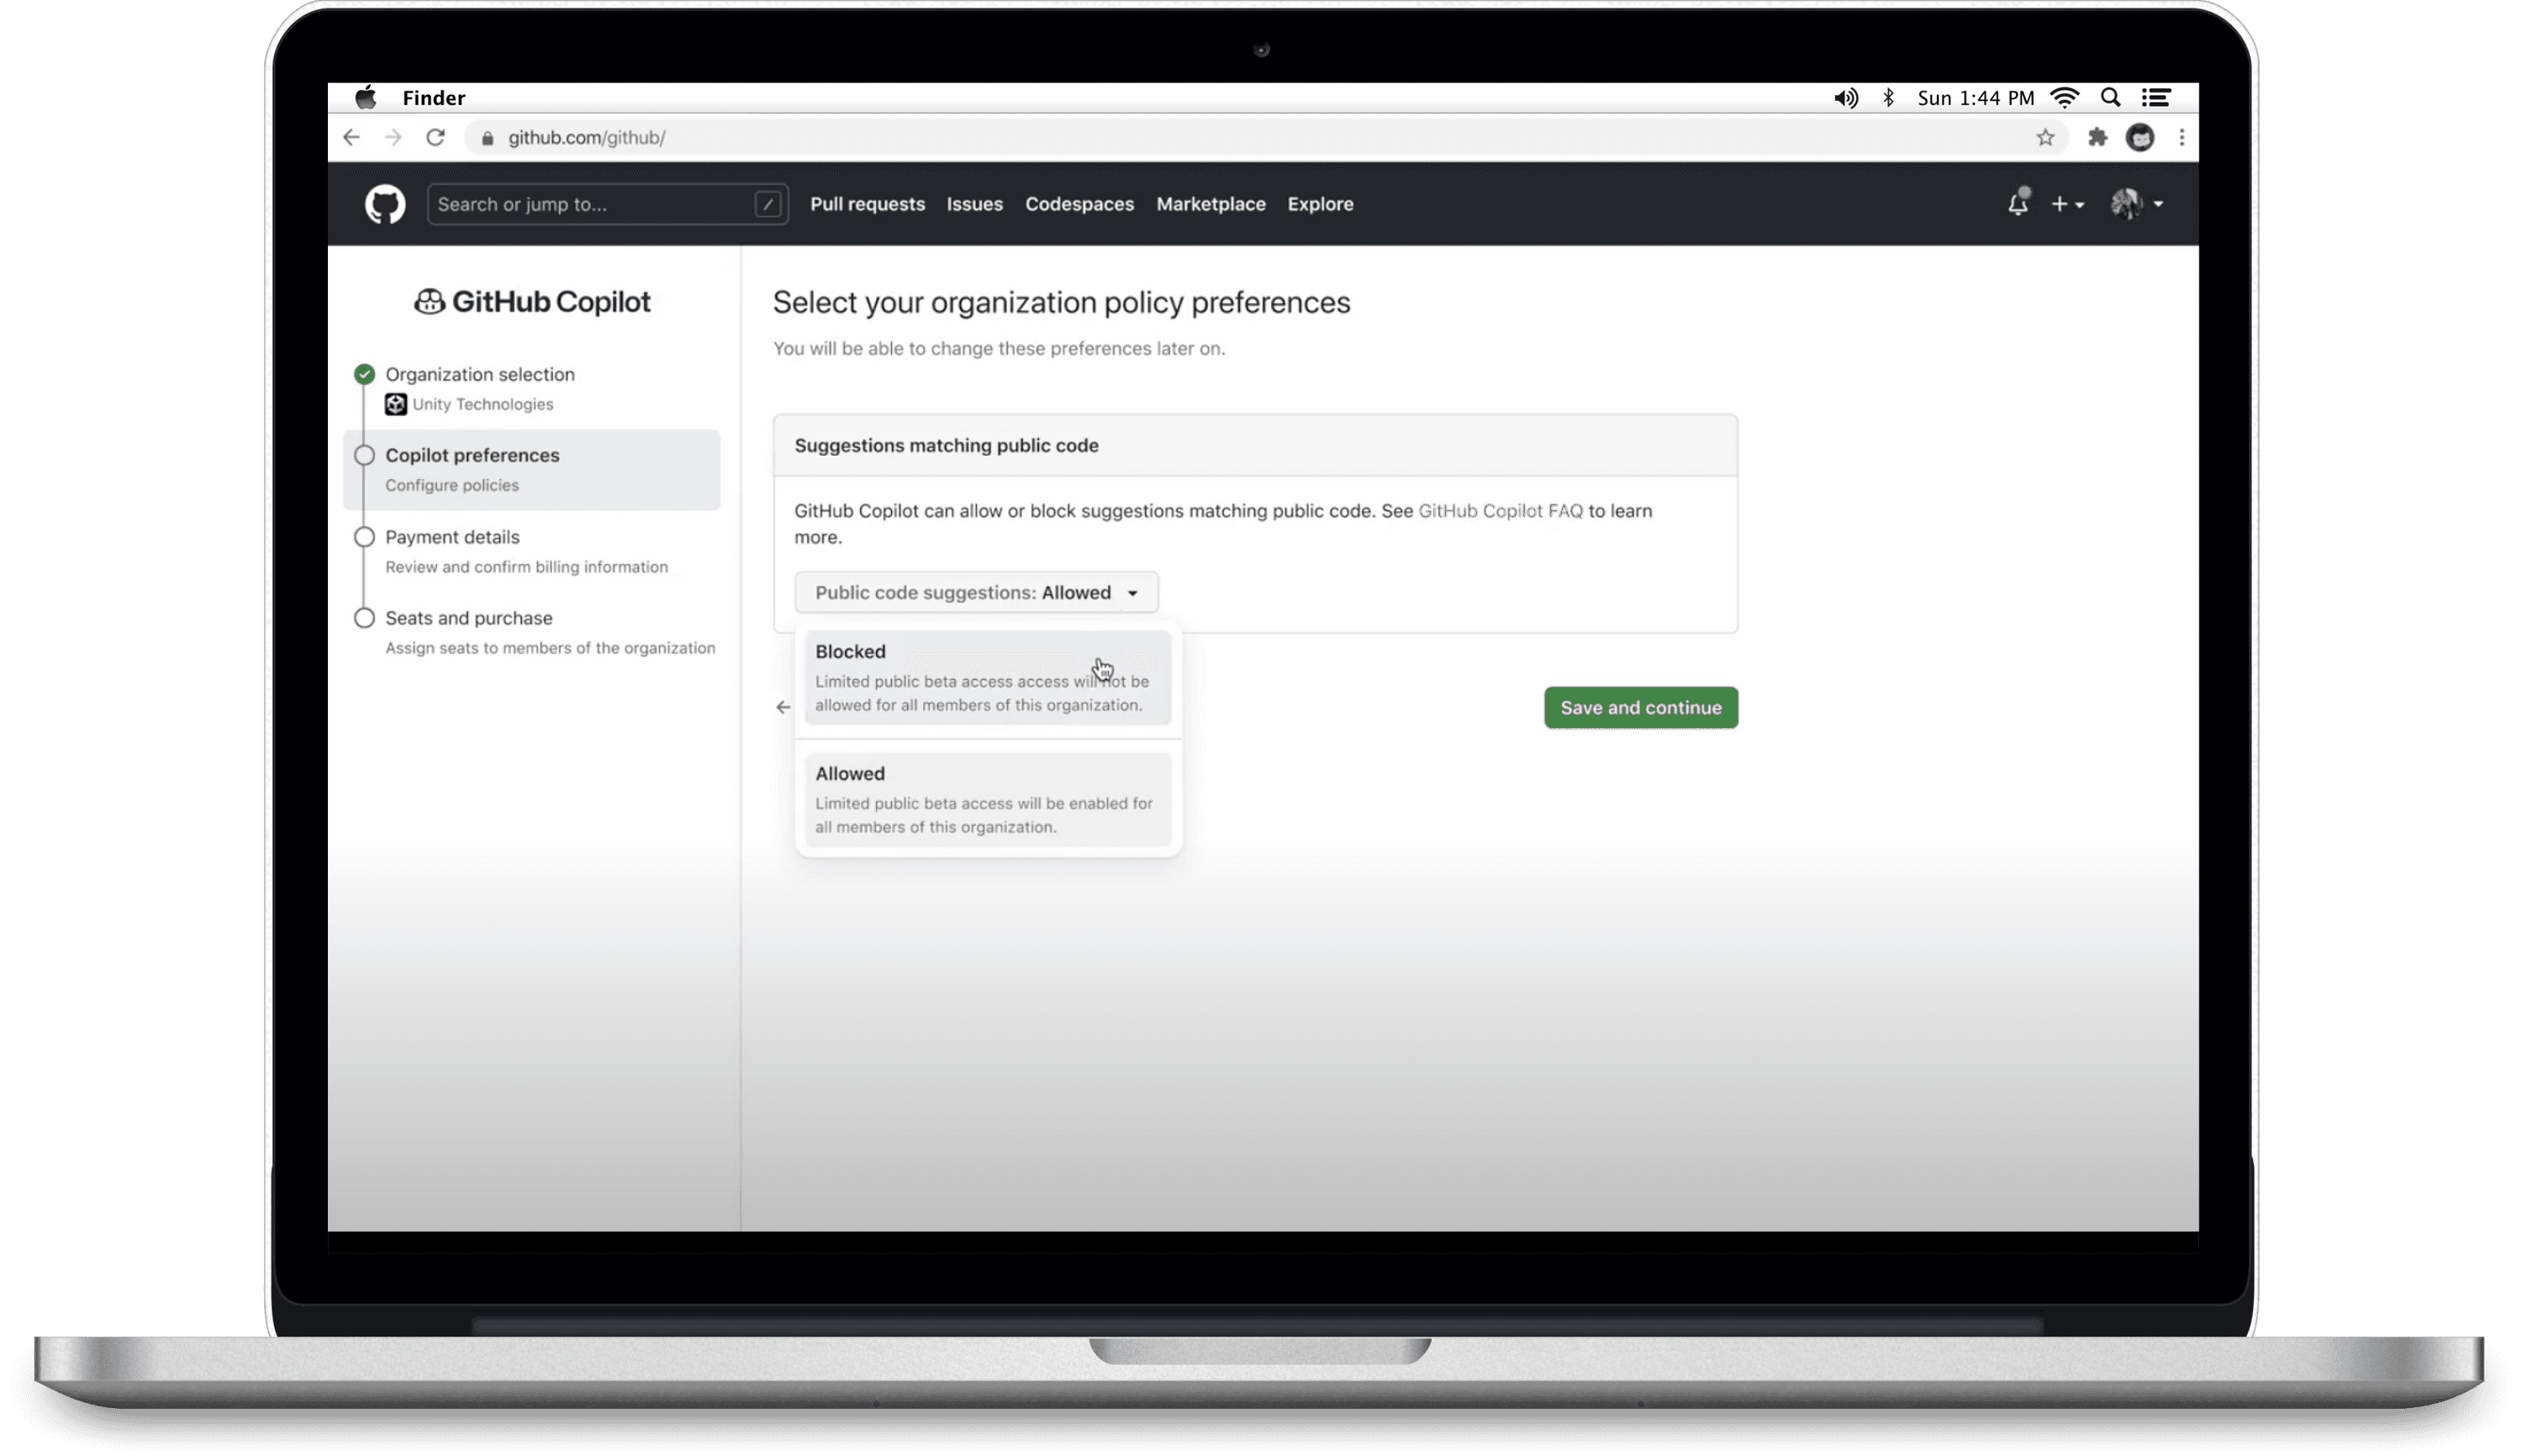
Step 2: Copilot Preferences
During the time of my internship, there was only one policy for the users to configure. However, this page is scalable and new policies can easily be added.
Once a step is completed, it is checked off and the emphasis is moved onto the next step. This communicates to the user that they are on the right track, generating confidence in the user.
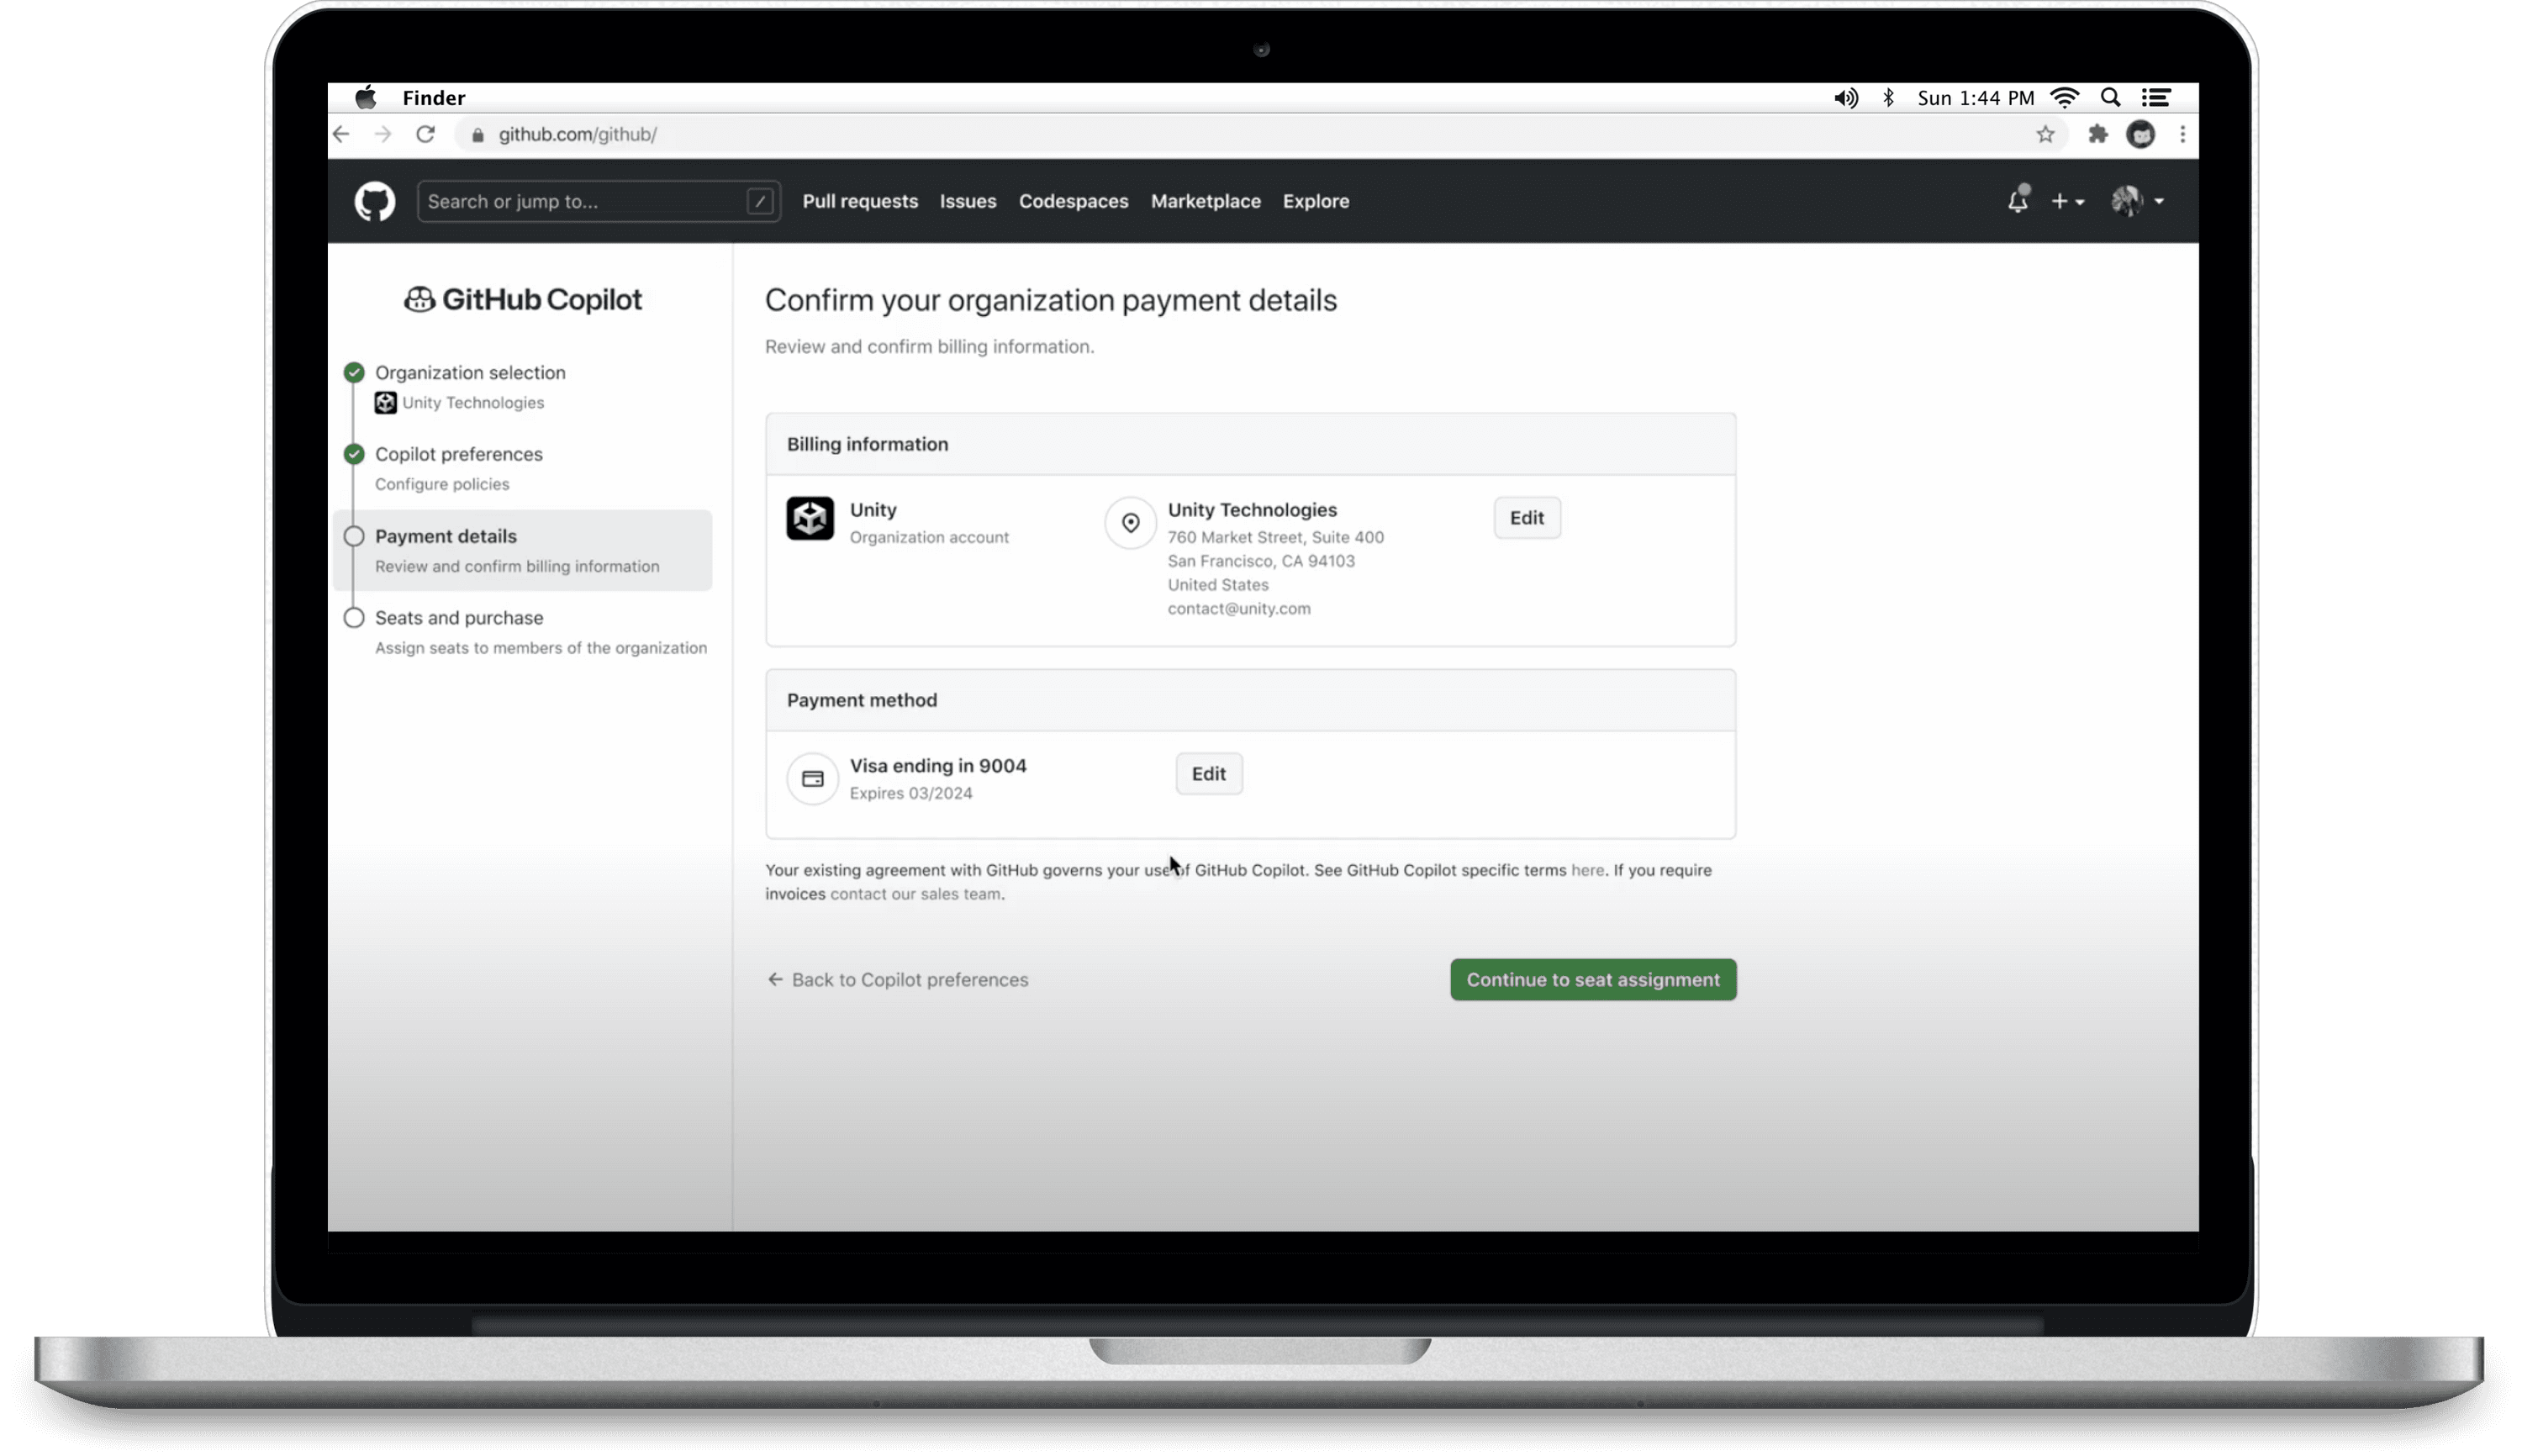
Step 3: Payment Details
This step is what caused much of the confusion in users in the previous experience. Due to legal constraints, we needed to collect payment details before the user had the option to assign Copilot Seats. Because the previous experience did not clearly communicate to the user that they would have the chance to assign seats after verifying their payment details, users would reach out to our support team worried that they were already getting charged in this step.
In my redesign, the user can clearly see that this is not the last step, and it will be followed by assigning seats and purchasing.
Furthermore, if the user needs to change their purchasing information, they can easily do so without leaving the flow. This minimizes the possibility of them leaving and not coming back so we can ensure they make a purchase.
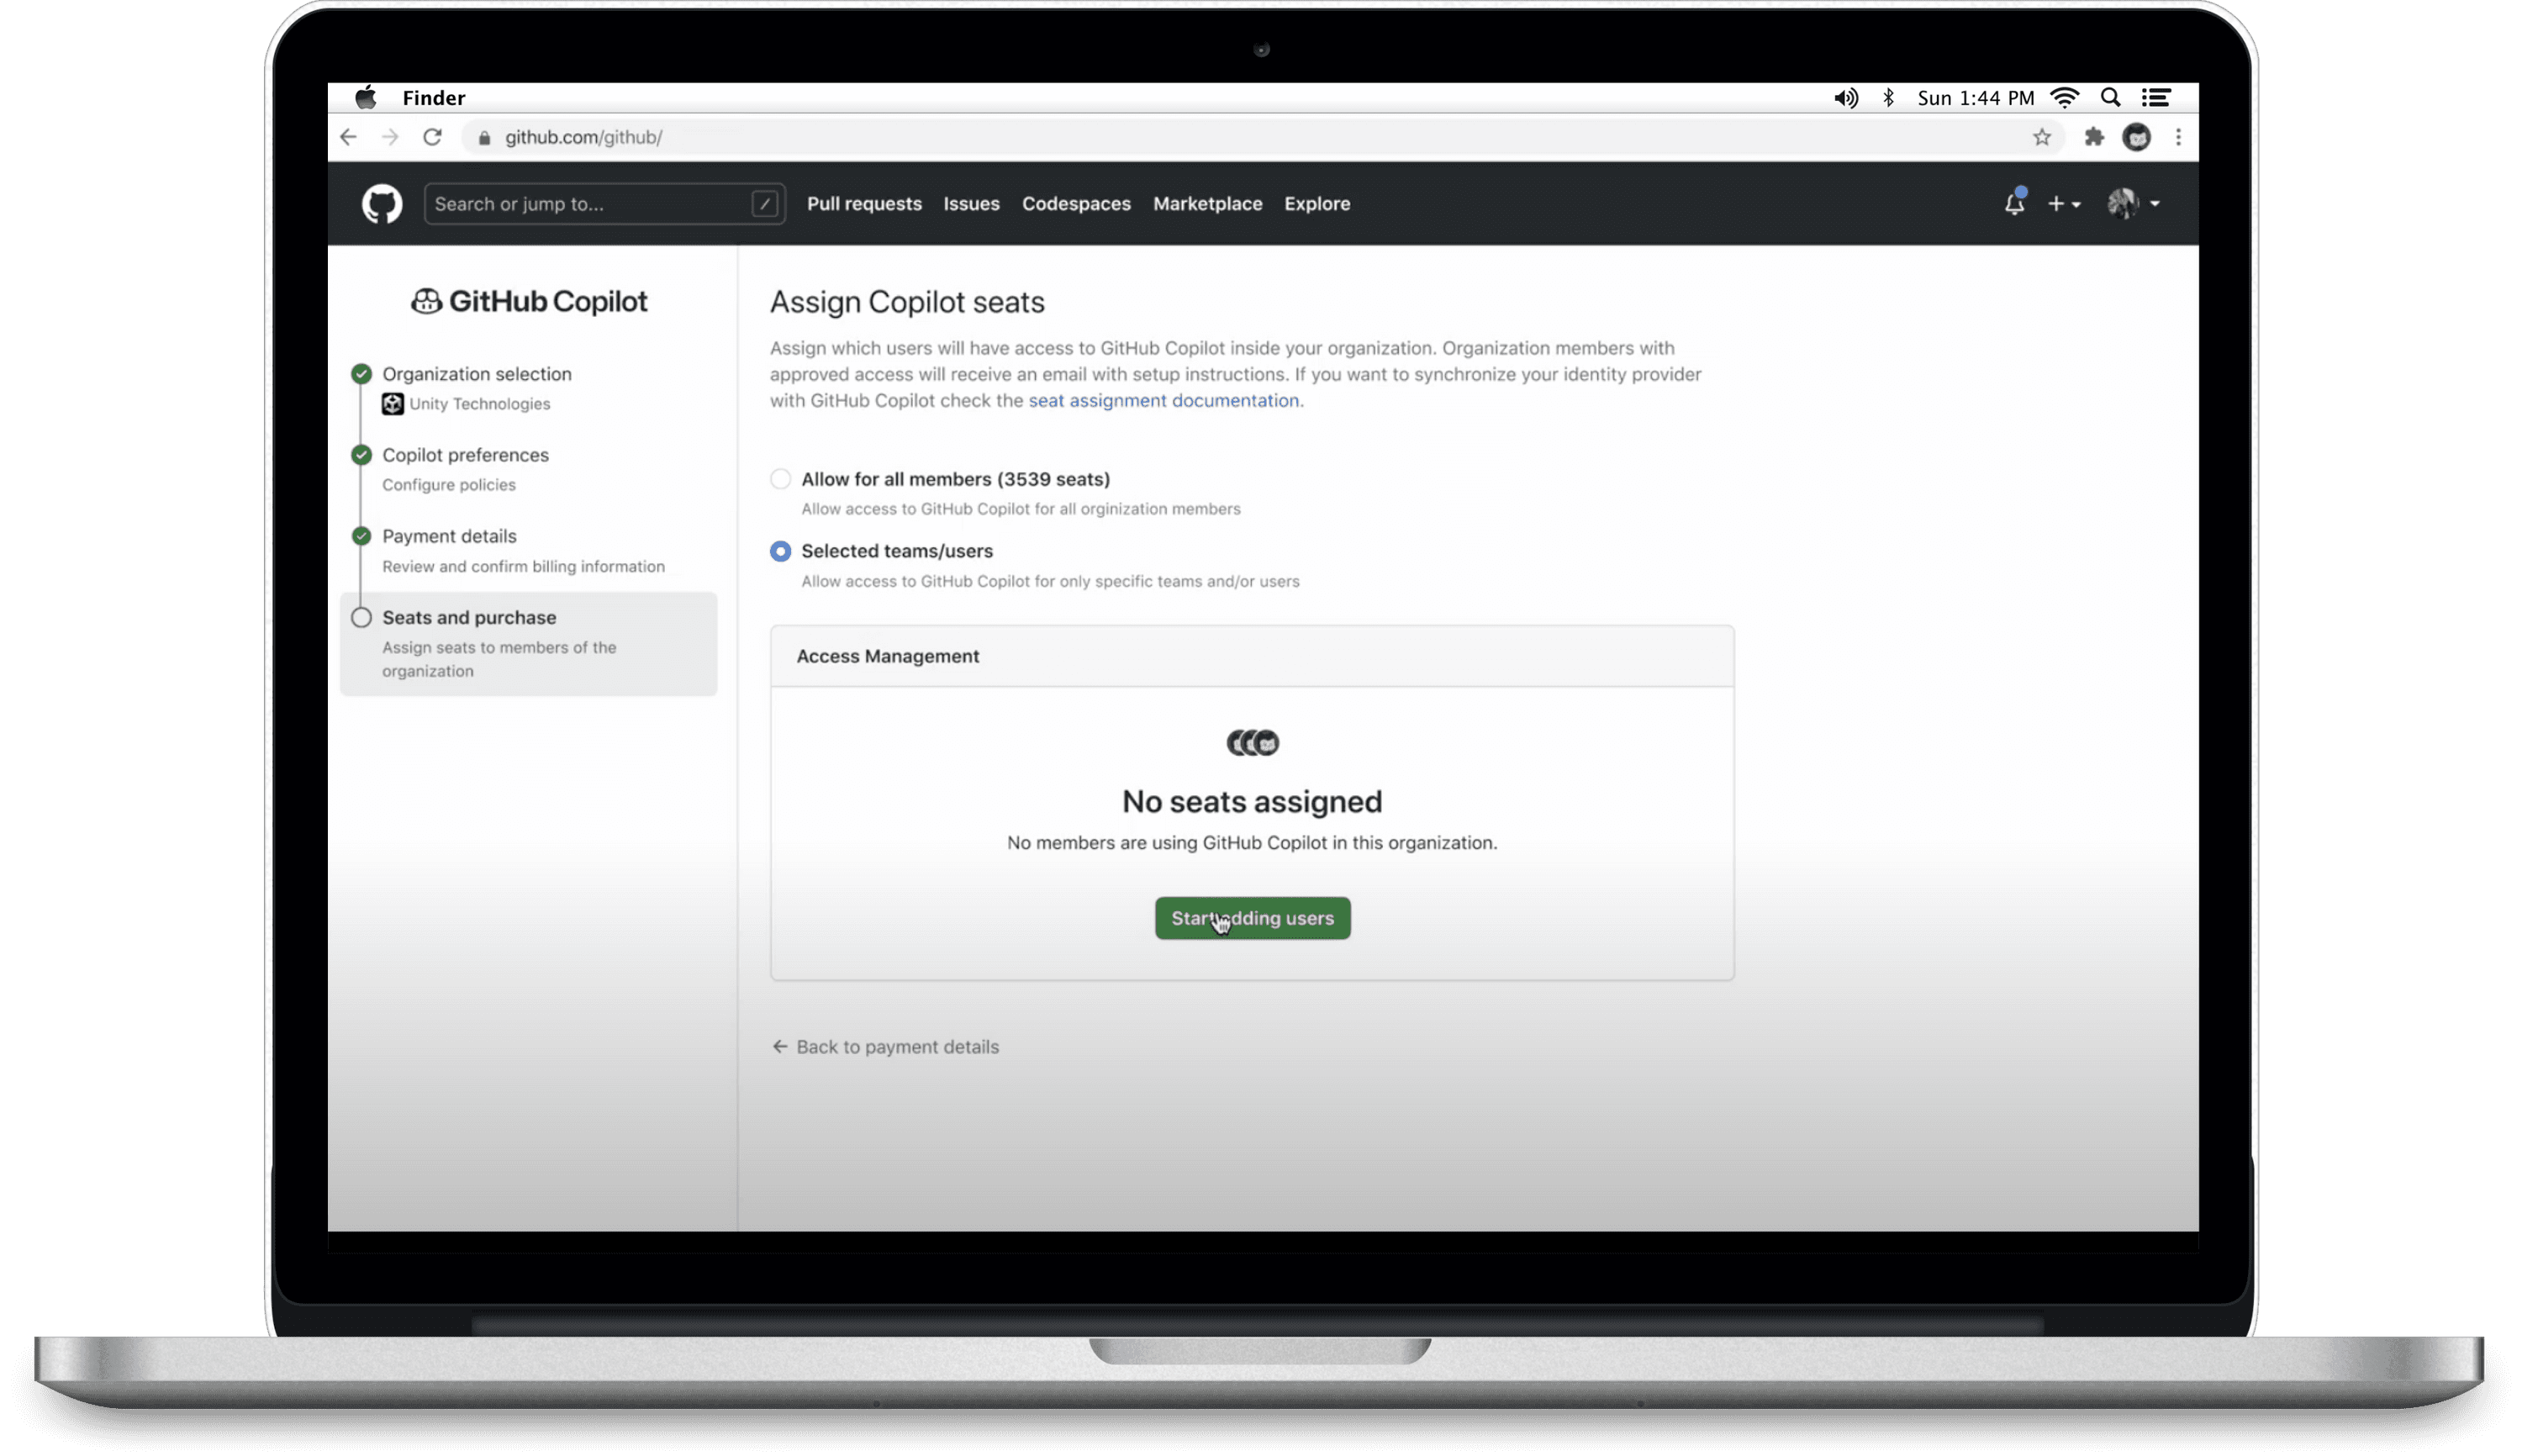
Step 4: Assigning Seats and Purchasing
Having this screen as the only one in the flow with a listed dollar amount clearly communicates to the user that this is where they are making a purchase, not when they are confirming their payment info in the previous step.
Having this screen as the only one in the flow with a listed dollar amount clearly communicates to the user that this is where they are making a purchase, not when they are confirming their payment info in the previous step.
Having this screen as the only one in the flow with a listed dollar amount clearly communicates to the user that this is where they are making a purchase, not when they are confirming their payment info in the previous step.
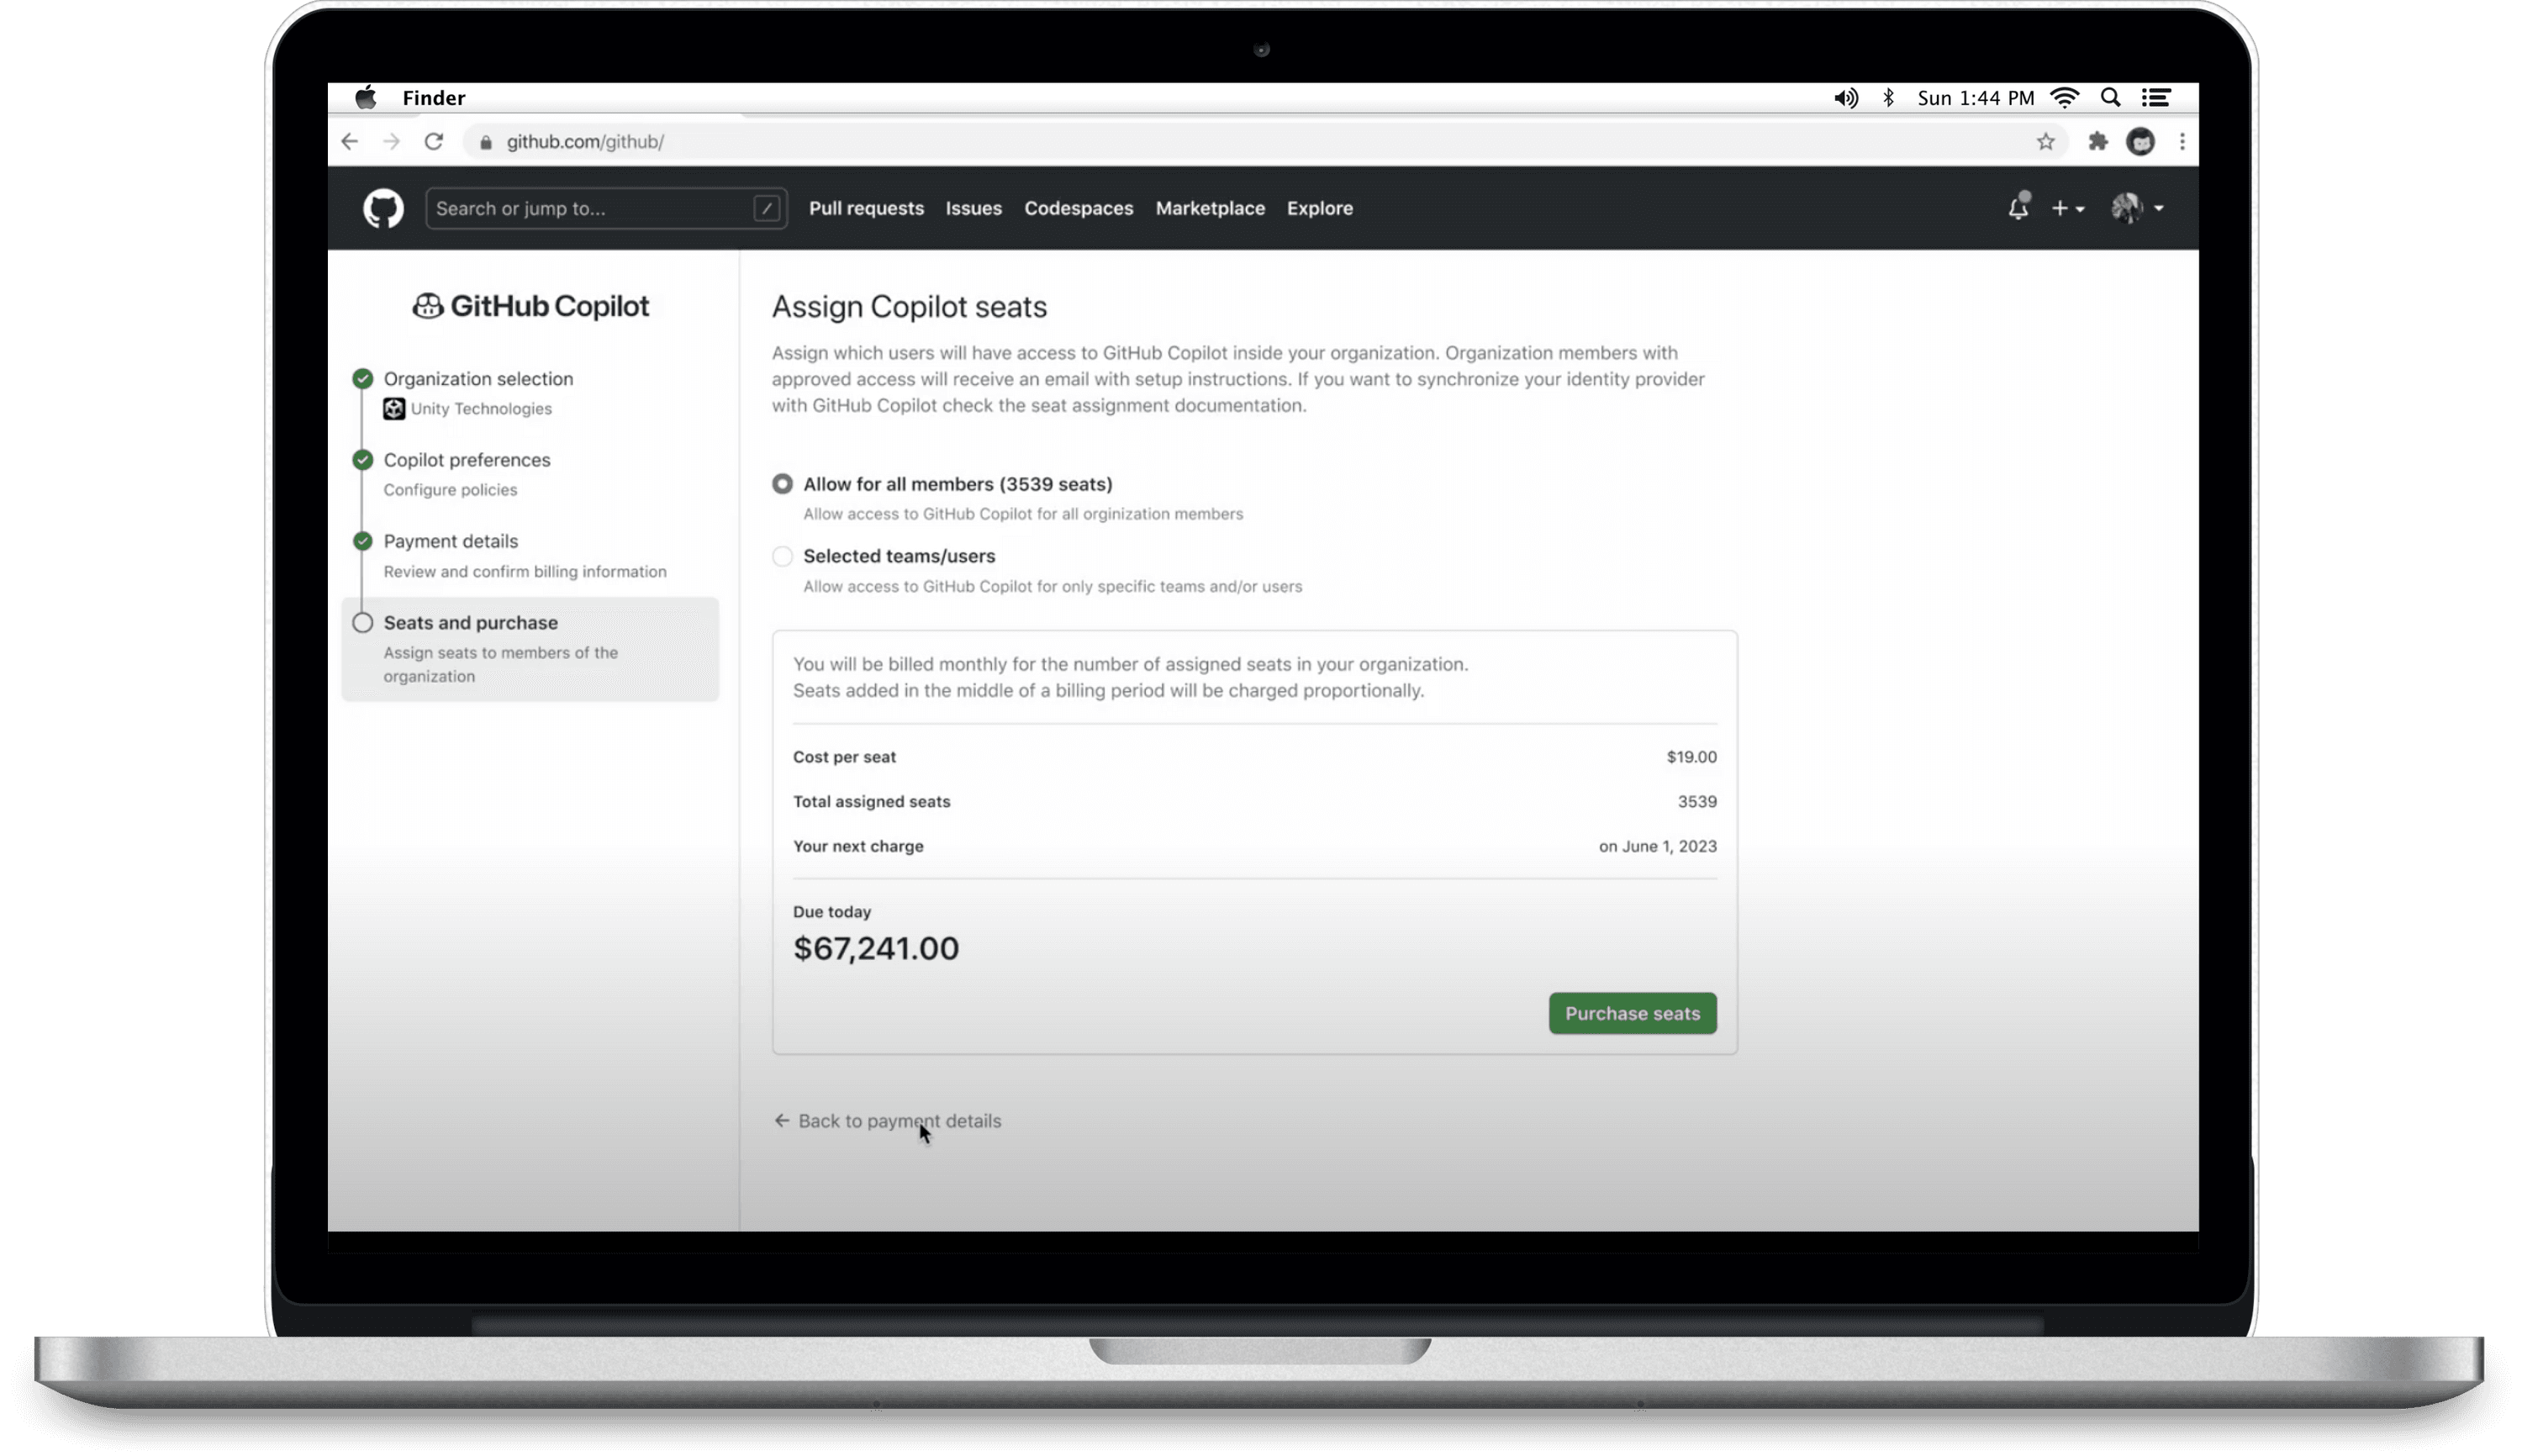
There is an option to manually select specific members of their organization to grant Copilot access to. If there aren't any seats assigned, there is no option to purchase as with the previous interface.
There is an option to manually select specific members of their organization to grant Copilot access to. If there aren't any seats assigned, there is no option to purchase as with the previous interface.
There is an option to manually select specific members of their organization to grant Copilot access to. If there aren't any seats assigned, there is no option to purchase as with the previous interface.
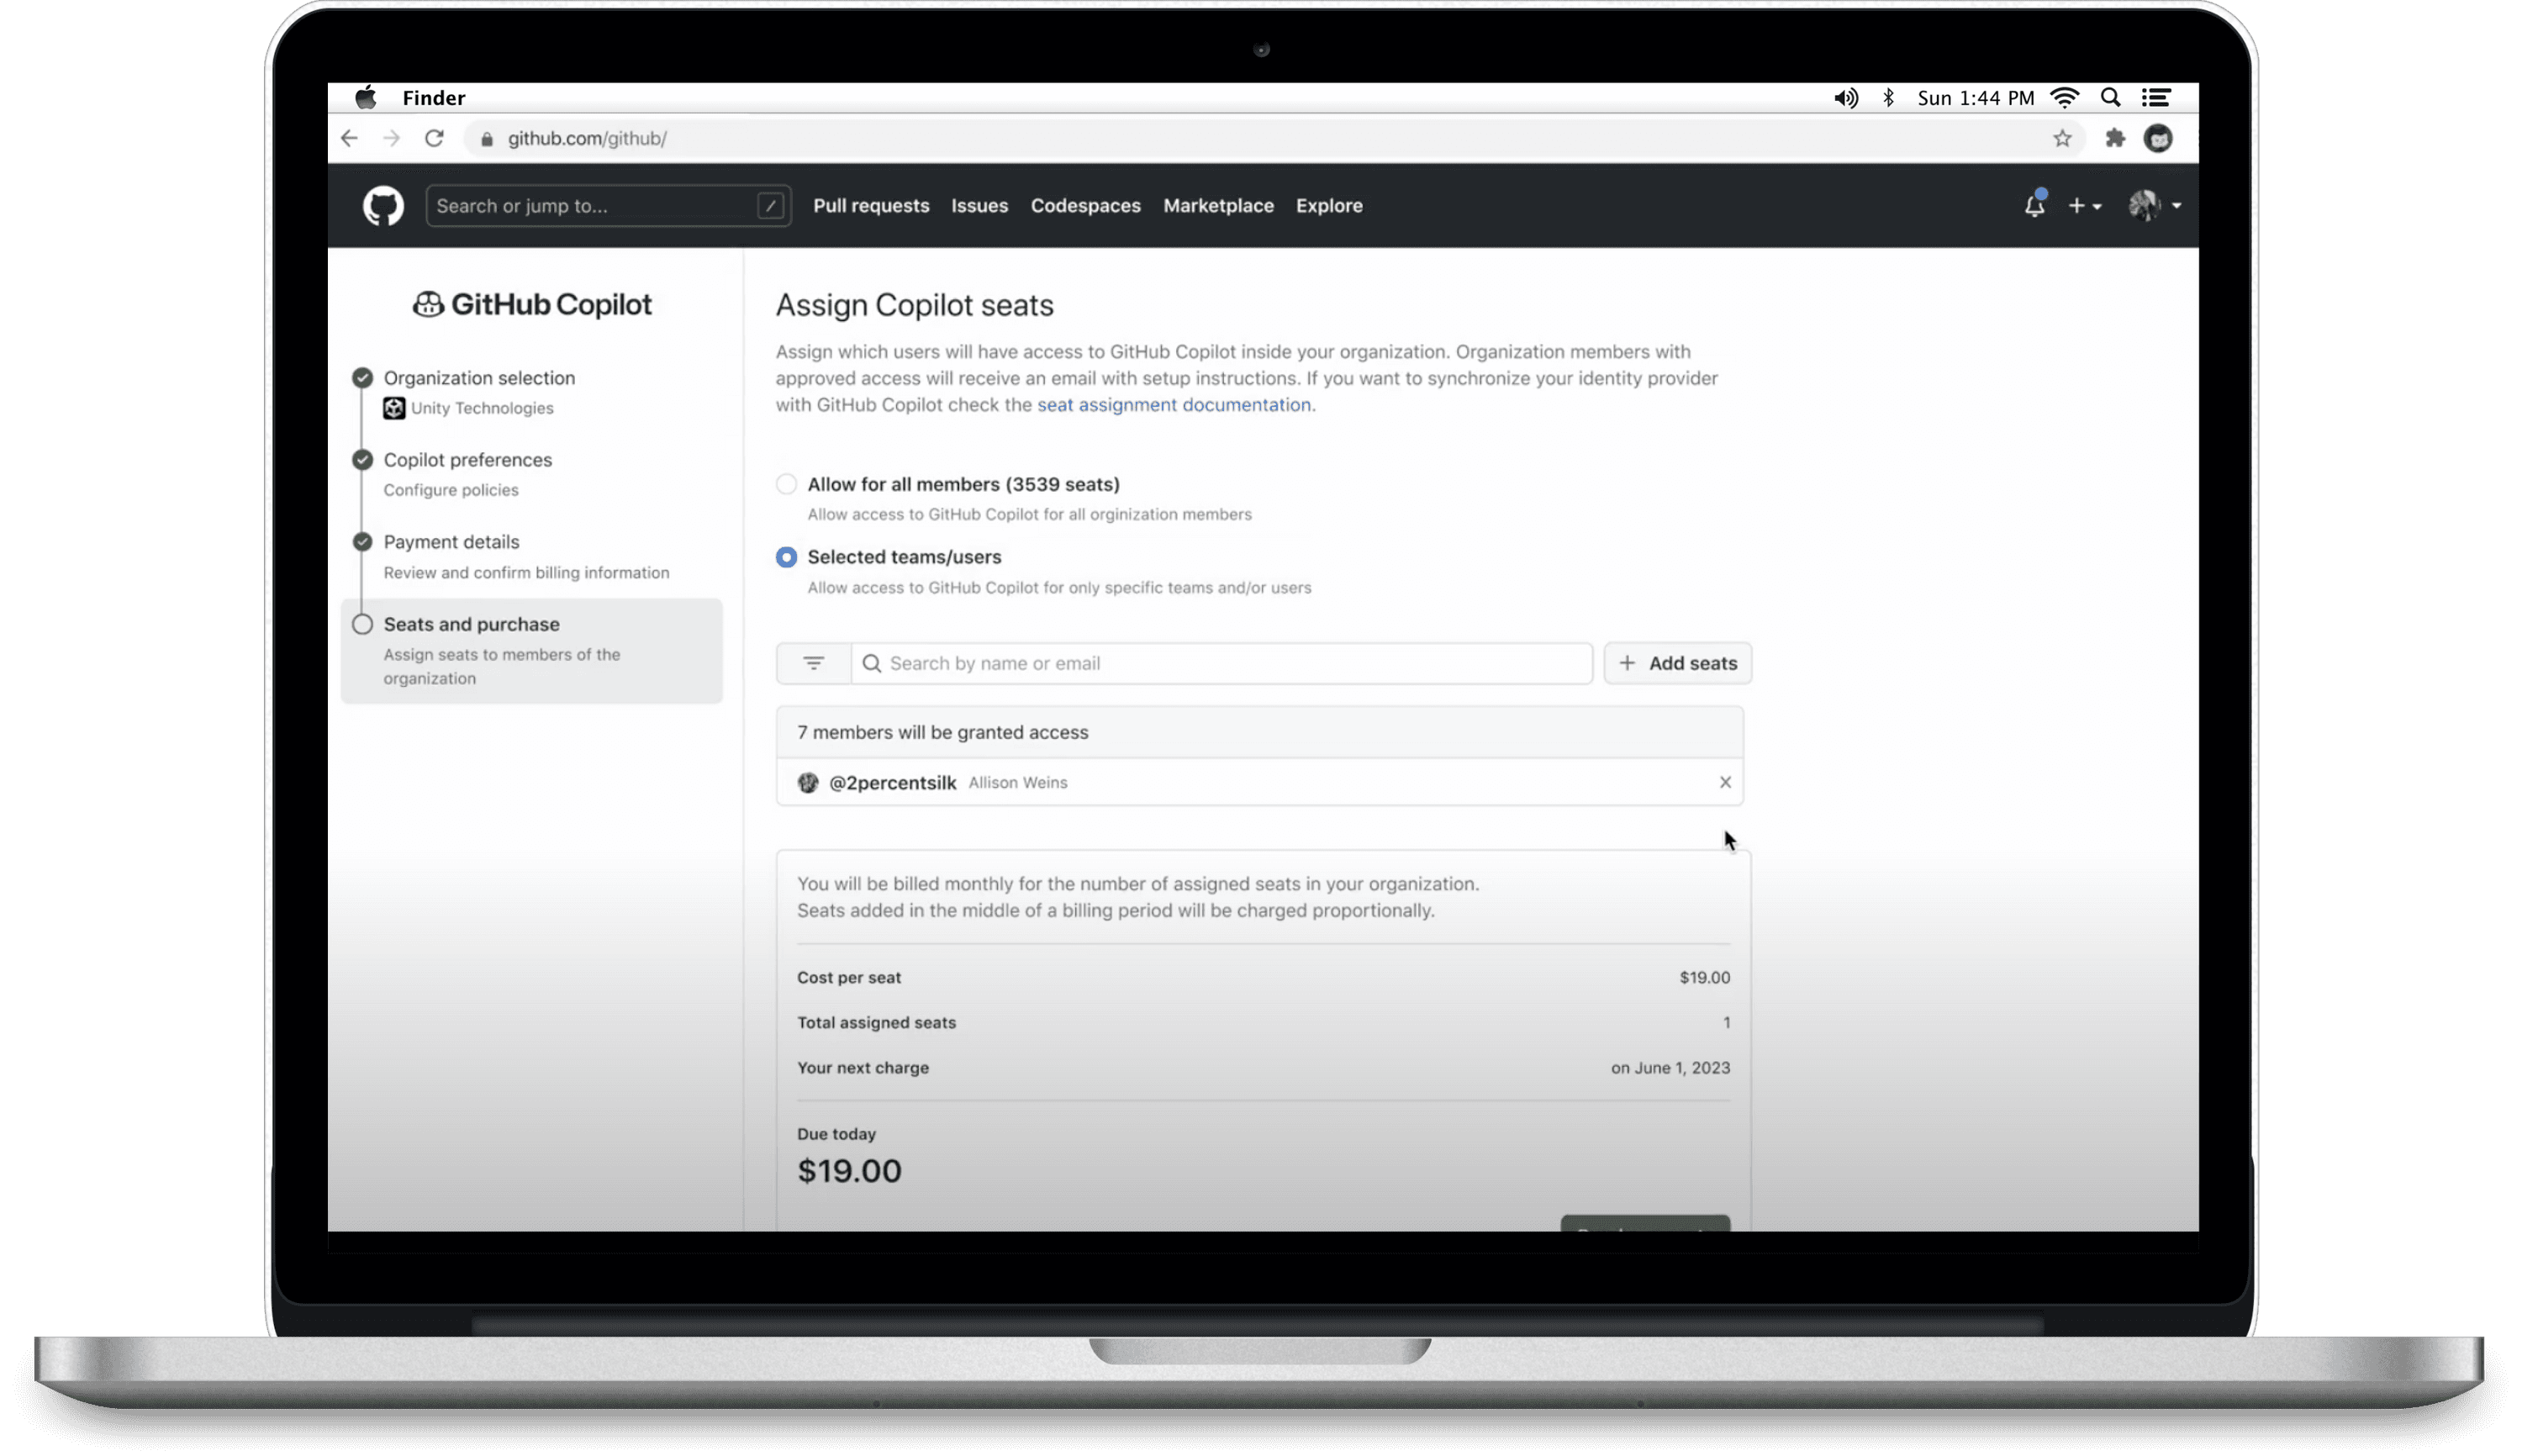
Manually selecting members of their organization renders a card to search for members in their organization, with those that have requested Copilot access at the top of the list to increase conversion.
Manually selecting members of their organization renders a card to search for members in their organization, with those that have requested Copilot access at the top of the list to increase conversion.
Manually selecting members of their organization renders a card to search for members in their organization, with those that have requested Copilot access at the top of the list to increase conversion.

Seat assignment and purchasing are together in one step to allow for quick adjustment of who is assigned seats while also displaying an updated price. The user can easily remove who they're granting access to with the click of an 'x', and the payment information gets updated – another way for the user to feel informed and confident to make a purchase.
Seat assignment and purchasing are together in one step to allow for quick adjustment of who is assigned seats while also displaying an updated price. The user can easily remove who they're granting access to with the click of an 'x', and the payment information gets updated – another way for the user to feel informed and confident to make a purchase.
Seat assignment and purchasing are together in one step to allow for quick adjustment of who is assigned seats while also displaying an updated price. The user can easily remove who they're granting access to with the click of an 'x', and the payment information gets updated – another way for the user to feel informed and confident to make a purchase.
Now that they have made a purchase, there is a success screen that shares the next steps for gaining Copilot access!
Now that they have made a purchase, there is a success screen that shares the next steps for gaining Copilot access!
Now that they have made a purchase, there is a success screen that shares the next steps for gaining Copilot access!

Reflection
Moving Past Decision Paralysis
I spent the beginning part of my internship spinning my wheels and painstakingly thinking through every pixel and every decision, but ultimately what permitted the most growth and progress was to throw something together and continuously iterate on it based on feedback and reviews with my team.
I spent the beginning part of my internship spinning my wheels and painstakingly thinking through every pixel and every decision, but ultimately what permitted the most growth and progress was to throw something together and continuously iterate on it based on feedback and reviews with my team.
Collaboration, Synchronously and Asynchronously
As my internship was fully remote, I quickly learned how to take advantage of the small overlap in the workday that I had with my European counterparts. This taught me how to be efficient in design reviews, sharing my design progress and reasoning whether it be over a 15 minute Zoom call or a quick video sent over Slack.
As my internship was fully remote, I quickly learned how to take advantage of the small overlap in the workday that I had with my European counterparts. This taught me how to be efficient in design reviews, sharing my design progress and reasoning whether it be over a 15 minute Zoom call or a quick video sent over Slack.